Automating Machine Learning Pipelines with Apache Airflow: A Beginner’s Guide
Table of Content
- Introduction
- Setting Up the Environment
- Scheduling the Pipeline
- Designing the ML Pipeline
- Implementing the ML Pipeline in Airflow
- Error Handling and Debugging in Airflow
- Running and Monitoring the Pipeline
- Conclusion
Introduction
Managing machine learning (ML) workflows can be a daunting task, especially when they involve multiple phases such as data ingestion, preprocessing, model training, and deployment. In my journey as an ML engineer, I have often come across the need to automate these processes to save time, reduce errors, and ensure consistency. This is where Apache Airflow comes to the rescue.
Apache Airflow is an open-source platform allowing you to create, schedule, and monitor workflows programmatically. Its flexibility and robustness make it my favorite tool for orchestrating ML pipelines. In this blog, I will share a step-by-step guide to automating a common ML pipeline using Airflow based on my experience.
1. Understanding the Need for Workflow Orchestration
Challenges
Especially when working with ML models in production, a system that can manage the entire workflow from data collection to model deployment is critical. Doing this manually is not only time-consuming but also error-prone. Moreover, as the number of models and data sources grows, managing these workflows becomes increasingly complex.
Why Airflow?
Apache Airflow is a powerful workflow orchestration tool that allows you to define workflows as directed acyclic graphs (DAGs). Airflow enables you to automate repetitive tasks, schedule workflows, and efficiently handle dependencies between tasks. It provides a web-based interface to monitor and manage these workflows, making it easy to track progress and identify issues.
2. Setting Up the Environment
Requirements
Before we dive into setting up Airflow with Docker, make sure you have the following installed:
- Docker: Platform for developing, shipping, and running applications in containers.
- Docker Compose: A tool for defining and running multi-container Docker applications.
Setting up Airflow with Docker Compose Using Docker and Docker-Compose is an easy way to set up Airflow, as it automatically handles the installation of dependencies and configuration. Here’s how I set up Airflow in my environment with Docker:
Step-by-Step Installation
Step 1: Create a New Directory
Create a directory to hold your Airflow configuration files.
mkdir airflow
cd airflow
Step 2: Create a Docker Compose File
Download the Docker Compose file for Airflow. You can use curl to fetch it directly:
curl -LfO 'https://airflow.apache.org/docs/apache-airflow/2.6.1/docker-compose.yaml'Alternatively, you can create a file named docker-compose.yaml and paste the necessary configuration into it. Here’s a basic example:
version: '3.4'

services:
  postgres:
    image: postgres:13
    environment:
      POSTGRES_USER: airflow
      POSTGRES_PASSWORD: airflow
      POSTGRES_DB: airflow
    ports:
      - "5434:5432"

  webserver:
    image: apache/airflow:2.6.1
    depends_on:
      - postgres
    environment:
      - AIRFLOW__CORE__SQL_ALCHEMY_CONN=postgresql+psycopg2://airflow:airflow@postgres/airflow
    ports:
      - "8080:8080"

  scheduler:
    image: apache/airflow:2.6.1
    depends_on:
      - webserver
Step 3: Create Required Directories
Create directories for DAGs, logs, and plugins:
mkdir dags logs pluginsStep 4: Initialize the Database
Before starting Airflow, initialize the database:
docker compose up airflow-initStep 5: Start Airflow
Now, start all Airflow services:
docker compose upThis will run the containers in the background. You can check the status of the containers with:
docker psStep 6: Access the Airflow UI
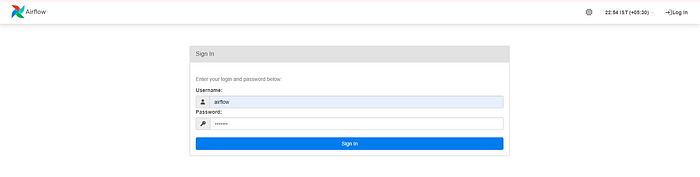
Once the containers are running, access the Airflow web interface by navigating to http://localhost:8080 in your web browser. The default login credentials are:
Username: airflow
Password: airflow
Stopping Airflow
To stop the Airflow services, you can use:
docker compose down3. Designing the ML Pipeline
Pipeline Overview:
In this blog, we will show how to automate a simple ML pipeline consisting of the following phases:
- Data Ingestion: Get data from sources.
- Model Training: Train a machine learning model on the dataset.
- Model Evaluation: Evaluate the model performance.
DAG (Directed Acyclic Graph)
In Airflow, a workflow is defined as a DAG representing a collection of tasks with defined dependencies. Each task represents a step in a workflow. In the case of an ML pipeline, the DAG represents the entire end-to-end process, and each stage in the ML pipeline becomes a task in the DAG.
Choosing an Operator
Airflow provides a variety of operators to perform different types of tasks. In this ML pipeline, we used the following:
- PythonOperator: Runs Python functions for data ingestion, validation, training, and evaluation.
- BashOperator: All command line operations, but was not required in this example.
4. Implementing the ML Pipeline in Airflow
Creating a DAG
I defined a Python script to create a DAG with all the tasks and their dependencies. The DAG definition for my ML Pipeline looks like this:
from airflow import DAG
import os
from airflow.operators.python import PythonOperator
from airflow.operators.dummy import DummyOperator
from datetime import datetime
import pandas as pd
from sklearn.datasets import load_iris
from sklearn.model_selection import train_test_split
from sklearn.tree import DecisionTreeClassifier
from sklearn.metrics import accuracy_score
import pickle
import json

# Define paths
DATA_PATH = 'Airflow/data/iris_data.csv'
MODEL_PATH = 'Airflow/data/decision_tree_model.pkl'

# Load data
def load_data():
    os.makedirs(os.path.dirname(DATA_PATH), exist_ok=True)

    iris = load_iris()
    data = pd.DataFrame(data=iris.data, columns=iris.feature_names)
    data['target'] = iris.target
    data.to_csv(DATA_PATH, index=False)
    return DATA_PATH  # Return the path of the CSV file

# Train the model
def train_model(data_path, **kwargs):
    data = pd.read_csv(data_path)  # Read data from the CSV file
    X = data.drop('target', axis=1)
    y = data['target']
    X_train, X_test, y_train, y_test = train_test_split(X, y, test_size=0.2, random_state=42)

    model = DecisionTreeClassifier()
    model.fit(X_train, y_train)

    # Save the model using pickle
    with open(MODEL_PATH, 'wb') as model_file:
        pickle.dump(model, model_file)

    # Print the shapes of the test data
    print(f"X_test shape: {X_test.shape}, y_test shape: {y_test.shape}")

    # Push test data to XCom
    ti = kwargs['ti']
    ti.xcom_push(key='X_test', value=json.dumps(X_test.values.tolist()))  # Convert to JSON serializable format
    ti.xcom_push(key='y_test', value=json.dumps(y_test.tolist()))  # Convert to JSON serializable format

    return MODEL_PATH

# Evaluate the model
def evaluate_model(ti):
    """
    Evaluate the machine learning model using the test data.
    """

    # Pulling test data from XCom
    X_test = ti.xcom_pull(task_ids='train_model', key='X_test')
    y_test = ti.xcom_pull(task_ids='train_model', key='y_test')

    # Debug log to inspect what X_test is before parsing
    print(f"Value of X_test before JSON parsing: {X_test}")

    # Check if X_test or y_test is empty or None before attempting to parse
    if not X_test or not y_test:
        raise ValueError("X_test or y_test is empty or None. Cannot proceed with JSON parsing.")

    # Parse the test data
    try:
        X_test = json.loads(X_test)
        y_test = json.loads(y_test)
    except json.JSONDecodeError as e:
        print(f"JSON decoding failed: {e}")
        raise

    # Load the trained model
    with open(MODEL_PATH, 'rb') as model_file:
        model = pickle.load(model_file)

    # Convert X_test and y_test back to DataFrame and Series
    X_test = pd.DataFrame(X_test, columns=load_iris().feature_names)
    y_test = pd.Series(y_test)

    # Evaluate the model
    predictions = model.predict(X_test)
    accuracy = accuracy_score(y_test, predictions)
    print(f"Model accuracy: {accuracy}")

# Define DAG and its default arguments
default_args = {
    'owner': 'airflow',
    'start_date': datetime(2024, 9, 1),
    'retries': 1
}

dag = DAG(
    dag_id='ml_pipeline',
    default_args=default_args,
    description='Machine Learning Pipeline',
    schedule_interval='@daily'
)

# Create tasks for each function
start_task = DummyOperator(task_id='start', dag=dag)

load_data_task = PythonOperator(
    task_id='load_data',
    python_callable=load_data,
    dag=dag
)

train_model_task = PythonOperator(
    task_id='train_model',
    python_callable=train_model,
    op_kwargs={'data_path': '{{ task_instance.xcom_pull(task_ids="load_data") }}'},  # Pass the path of the CSV file
    provide_context=True,  # Added to pass context for XCom usage
    dag=dag
)

evaluate_model_task = PythonOperator(
    task_id='evaluate_model',
    python_callable=evaluate_model,
    provide_context=True,  # This line allows passing the task_instance to access XCom
    dag=dag
)

end_task = DummyOperator(task_id='end', dag=dag)

# Set task dependencies
start_task >> load_data_task >> train_model_task >> evaluate_model_task >> end_task
Defining the Tasks
Each task in the DAG is defined using a Python function. For example, the evaluate_model task checks the model performance against the test data set. The PythonOperator then calls the following function:
# Evaluate the model
def evaluate_model(ti):
    """
    Evaluate the machine learning model using the test data.
    """

    # Pulling test data from XCom
    X_test = ti.xcom_pull(task_ids='train_model', key='X_test')
    y_test = ti.xcom_pull(task_ids='train_model', key='y_test')

    # Debug log to inspect what X_test is before parsing
    print(f"Value of X_test before JSON parsing: {X_test}")

    # Check if X_test or y_test is empty or None before attempting to parse
    if not X_test or not y_test:
        raise ValueError("X_test or y_test is empty or None. Cannot proceed with JSON parsing.")

    # Parse the test data
    try:
        X_test = json.loads(X_test)
        y_test = json.loads(y_test)
    except json.JSONDecodeError as e:
        print(f"JSON decoding failed: {e}")
        raise

    # Load the trained model
    with open(MODEL_PATH, 'rb') as model_file:
        model = pickle.load(model_file)

    # Convert X_test and y_test back to DataFrame and Series
    X_test = pd.DataFrame(X_test, columns=load_iris().feature_names)
    y_test = pd.Series(y_test)

    # Evaluate the model
    predictions = model.predict(X_test)
    accuracy = accuracy_score(y_test, predictions)
    print(f"Model accuracy: {accuracy}")
5. Error Handling and Debugging in Airflow
Common Errors:
Errors are inevitable in any workflow. A common issue I faced involved an empty test data set that would raise a ValueError while evaluating the model.
Error Resolution:
Airflow’s logging feature is extremely useful for troubleshooting. By looking at the Airflow UI logs, I was able to identify the issue and modify my code to handle the case where the test set is empty.
Retries and Alerts
Airflow allows you to configure retries for failed tasks. This may help to solve the temporary problem. Here is how I set it:
default_args = {
    ...
    'retries': 3,
    'retry_delay': timedelta(minutes=5),
}
You can also set up email notifications for task errors, which allows you to stay up to date on any issues even if you’re not actively monitoring the Airflow UI.
6. Running and Monitoring the Pipeline
Triggering the DAG
Once the DAG was defined and the tasks were configured, we manually triggered the DAG using the Airflow UI. The tasks were executed one after the other and we could monitor the progress in real time.
Monitoring
Airflow’s Web UI visualizes the DAG execution and task status. It also provides detailed logs for each task, which is important for debugging and understanding task execution.
Metrics and Visualization
In addition to the Airflow UI, we integrated additional monitoring tools to visualize performance metrics and track the health of our pipeline over time. This gave us insight into how long tasks were taking and helped us identify bottlenecks.
7. Scheduling the Pipeline
Schedule Interval
Airflow allows you to specify a schedule interval to automate the execution of your DAG. I set my pipeline to run daily using schedule_interval=timedelta(days=1). This ensures that my ML pipeline runs at a consistent time every day.
CRON Expression
When creating a DAG, you can define the schedule using a CRON expression as a string passed to the schedule_interval parameter.
dag = DAG(
dag_id='ml_pipeline',
start_date=datetime(2024, 1, 1),
schedule='00 12 * * *'
)
This schedules the DAG to run daily at 12:00. CRON expressions are flexible and can use the minutes, hours, days, months, and days of the week fields.
Time Intervals
Instead of CRON, you can use the Timedelta object from the Datetime library to schedule your DAG at a fixed interval.
dag = DAG(
dag_id='ml_pipeline',
start_date=datetime(2024, 1, 1),
schedule=timedelta(minutes=30)
)
This will schedule your DAG to run every 30 minutes.
Preset Schedules
Airflow provides several preset schedules you can use:
@hourly: Run once an hour
@daily: Run once a day
@weekly: Run once a week
@monthly: Run once a month
@yearly: Run once a year
These can be used in place of CRON expressions or timedelta.
8. Conclusion
Automating ML pipelines with Apache Airflow has transformed the way I efficiently manage my workflows. Not only have I saved time, but I’ve also reduced errors and improved the consistency of my pipeline execution. From installation to defining DAGs, error handling, and scheduling, Airflow has proven to be a powerful tool in my ML toolkit.
I encourage you to consider Airflow for your ML projects. Its robust features and flexibility make it a great choice for orchestrating complex workflows. If you’re new to Airflow, start small, build up your confidence, and gradually automate more aspects of your ML workflows.
Thank you for reading this blog on “Automating Machine Learning Pipelines with Apache Airflow: A Beginner’s Guide”. I hope it was insightful and helpful. If you have any questions or doubts or would like to discuss this topic in more detail, feel free to reach out to me via LinkedIn or Twitter. I’m always happy to help and share ideas.